Sunday, 29 April 2012

Zucchine Ripiene alla Mozzarella ( Stuffed Courgettes, with Mozzarella)


As she emptied her shopping bag... a shower of green leaves "flew" out: chard, three, maybe four bundles of rucola, followed by peppers (really big ones, very shiny and funny shaped!) and  tiny, little friggitelli, the tiniest, cutest little peppers the child had ever seen!

At the bottom of the bag, four or five large zucchine: green, almost stripey and squeaky to touch!
She loved zucchine! Her mother said they tasted "fresh" in Summer. "Will we make Parmigiana with them?" "No"- Mamma replied "Oggi mangeremo le zucchine ripiene!" "No, today we will make stuffed courgettes!"
Having put all the green treasures away, mother and daughter (her little shoulders just above the height of the table top,) got to work, together.
The little girl watched her mother with admiration, as she scooped the pale green (almost white) flesh out of the beautiful zucchine. She knew that earthy smell very well, and she also knew that soon she would get the job of chopping the "bits" that mamma had scooped out of the courgettes .
Outside, it was very sunny and hot. Something told the little girl to savour this simple, ordinary, but at the same time precious moment, and hide it in the box she kept locked in her heart. You never know...
As I look out of the window, today, I see the world through a stream of water. Tiny drops of rain chase each other, as they make their way down the window payne.
It's been raining for days... day and night... night and day... incessantly... it never seems to stop. Will it ever stop?
I will  find refuge in my little universe of scents, words in another language, memories and sunshine.
Today I will go back to that day, in our kitchen in Italy and will make the dish I was helping my mamma prepare. 
Zucchine Ripiene
alla Mozzarella
  (Stuffed Courgettes
with mozzarella)

Ingredients:
Serves 4
2 fresh largish zucchine
(courgettes)
1 slice and half, or a small piece of white bread
4 cloves of garlic
1 egg
some Pecorino or Parmesan cheese
1 generous tbs of capers in vinegar
1 mozzarella
fresh parsley
5-6 cherry tmatoes (or
4 peeled plum tomatoes)
Olive oil
some water
 salt

black pepper
Wash your courgettes, trim the ends, then cut in half lengthways, and finally scoop the flesh out of the middle of each half ( I do this with  a spoon or a teaspoon, as I find it easier than using a knife!)
Now you should have four courgette shells and a some beautiful translucent courgette flesh. 


                             I could only fit three in my dish! I used the 4th one for
                                                          my risotto!


Cut the flesh into small cubes, then chop two cloves of garlic very finely and break your bread into small pieces (if your bread is not fresh, or is crusty, it should be quickly soaked in water and then squeezed, to get all the liquid out of it)
In a non stick pan (I have recently bought an excellent Jamie Oliver non stick frying pan, which I love! And I love him, too!) place 5-6 tbsp of olive oil. Heat and add your chopped courgette flesh and the garlic. Stir, as these two ingredients mingle in the pan, and the courgette begins to soften. Add your bread, cut into small pieces, stir and mix again.  Now you are ready to add a whole egg.


                                                      making the filling

Using a wooden spoon, make sure all the ingredients are well blended and combined (the egg will do this for you.)
 Finally, add a generous handful of Pecorino or Parmesan, some salt and lots of lovely black pepper and some fresh parsley. Cook until the egg is well incorporated, and finally add a teaspoon of capers. I added some pink peppercorns to my filling, as I like the way it looks and its flavour.
This is your lovely stuffing done!
Place your courgette shells in an ovenproof dish and divide the stuffing equally, between them.
Cut your mozzarella into cubes and gently push a few peaces of it into the filling of each courgette. It will melt and taste delicious as the dish cooks.
Place some olive oil (as much or as little as you like) at the base of the dish, followed by water, half the way up the courgettes. To the water, add some capers, some chopped garlic ( about two cloves, or more if you like garlic) two or three tomatoes, chopped, some grated cheese, salt, pepper and parsley.


Make sure that some of the cheese and some olive oil "land" on the top of your courgettes. I also like to put a few slices  of cherry tomato on each.


Bake in a fairly hot oven 190C (375F-Gas5) until the courgettes feel soft and the finished dish looks golden. You'll know the dish is ready when you can smell the aroma produced by the ingredients of my lovely dish!


As you can see from the pictures, I served my zucchine on individual oval dishes, with a small portion of risotto made with zucchina and garlic, two towers of Savoy cabbage, which I love and, on the side, a salad (rucola, cherry tomatoes, pan fried gnocchi and pasta) served in a little dish I made from a tortilla bread.


I thought my dish looked really quite pretty. I really love zucchine! Did you know you can make Parmigiana (look up my Parmigiana recipe!) using zucchine instead of aubergine ?


Saturday, 21 April 2012

BUONA DOMENICA! (Ragu` with Braciole- Italian Sunday Lunch)


Easter Sunday morning: the church bells are ringing, the swallows are flying. It's Springtime and I feel happy. Today I will wear my pink and gray tartan coat with my new shoes and my pink leather bag, the one with the long strap. I am ten and quite looking forward to going out with my friend Stella.

Mamma gives me some money for the collection, in church "Don't forget to bring a bottle of Holy water, so your father can bless the family before we start eating" says my mother. I promise I will. I have a small empty bottle in my bag. 
As I make my way to Stella's I feel the coins, in my pocket and I taste the sweet flavour of Menta Glaciale (my favourite sweets... they look like icebergs!) slowly melting in my mouth, and of liquorice. Inside my head, I am unrolling a wheel of sweet, soft, chewy liquorice and I'm thinking:" They don't need my money! I'm not going to church!"
So, yes... we are not going to church, not today, not ever again! We have grown up (we are ten, after all) and we need to explore. Using all my money, we buy sweets (liquorice never tasted that good!) and we make our way to the city centre, leaving the church bells behind. We felt naughty and free. We walk and walk and walk, we eat sweets and drink lemonade out funny little plastic bottles. 
As we walk round the elegant city centre, we look at every shop and department store window, feeling very happy to be there, and very grown up. We then look at the time and realise that it's almost lunch time. We can tell because the sun feels ever so hot!
 Stella and I look at each other, panick and start running, in a straight line, all the way down a street. All the bars are shutting. Having had their aperitivo, people are making their way home for Easter Sunday lunch.
After what seemed like a very long race against time, we begin to see the familiar buildings, our school, the church and the shops in our "quartiere."
We say bye with a smile and both go home. What an adventure!
Once home, I ring the bell and Rosa, my mother opens the door "Where have you been? We are all waiting for you. Where's the holy water?" "Yes... where's the Holy water... what holy water? Oh, My god!" - I think. I quickly turn round and I run as fast as I can to the church.

 The big wooden door is locked "What shall I do? What shall I do? I was supposed to get some holy water from the church, but I never went there!"
As I look to the left of the church, I notice a little gate. I know it leads to a courtyard which runs along the side of the church and that... THEY HAVE A SINK, AND IT'S OUTSIDE!  I know the water won't be "Holy," but  but what else can I do? So, I fill the bottle from the tap and I run back home, all the way, holding it in one hand and melted liquorice in the other (by now black and sticky) hand.
My mum opens the door, again, I smile at her and finally I notice the smell of Sunday lunch: ragu` di carne con braciole. It must be Sunday, today! Words cannot explain the sense of love and confort I feel when I smell that aroma and I see all my family sat round our big round table. I'm so glad I found the way home!
It's Easter lunch time and my father is dipping an olive branch in a cup of (not at all) holy water which came from a tap outside the church. He smiles and blesses the family and the food on our table. I really don't have time to feel guilty. The food smells good, it's a sunny day and we are all together!


Today, I'm sharing our family recipe for Ragu` di Carne, con Braciole.


Ragù di Carne, con Braciole
Ingredients:
Braciole
 
6 thin slices of beef
(I used frying steak)
2 garlic cloves
a small bunch of fresh parsley
some grated Italian Cheese
(I like to use Pecorino)
2 slices of pancetta,
or some diced pancetta
black pepper
salt
some cocktail sticks

For the sauce:

800mls (1pt, 12floz) passata
1 large onion
7-8 tbsp olive oil
1 slice pancetta
a glass of wine
salt
pepper
a small piece of cheese
fresh basil
(this is optional
but I LOVE IT!)

Before you start making the sauce, prepare your braciole. These are delicious beef "parcels" which will make your sauce delicious!
Place your slices of beef (if they are not thin enough, use your meat mallet!) on a surfice, next to each other. In the middle of each, place some chopped garlic, some chopped fresh parsley, a couple of pieces of pancetta, or bacon, a generous sprinkling of Pecorino, which I prefer to Parmigiano, followed by salt and lots of black pepper.
Roll the slices, individually, and secure with a cocktail stick, making sure the filling stays inside. Place on a plate, and cover.


                                             My big sister Nunzia, buying meat in Italy


                                                braciole in the making!

                                                   ready to be cooked 


Now make the sauce. Finely chop the onion, then heat the oil. When hot, add the onion, followed by your pancetta, diced or chopped, if you are using the sliced kind. Stir until golden, then, one at a time, add your braciole. By now you should be smelling a fantastic aroma! If you have a piece of Pecorino, add it, too, as it will make your sauce taste really good!
When your braciole have browned, pour a glass of red or white wine, stir again and wait until the the alcohol evaporates. Now, the final stage: add your lovely passata, bring to the boil, the lower the heat to almost minimum, half cover with a lid and wait...
If the sauce appears to be thickening too much, to prevent the meat from sticking to the pan (some say that if this happens, it actually improves the flavour!) add a small amount of water.
A good ragù should cook for a good three to four hours, not less, otherwise your braciole will be so tough, you'll be able to play cricket with them. Nothing more off putting than a tough braciola. My mum's were always tender and succulent, but then, she really knew how to cook!


                                                         I sliced my braciola to serve


In Italy, ragù with braciole, or just meat (we don't mix meat, sausages and  meatballs, as it would be a lethal combination. We keep it simple) is often part of our Sunday dinner. We have the sauce on pasta with cheese, then the meat, as a second course with a contorno of patatine ( thinly sliced chips fried in olive oil, rosemary and garlic) and, in winter, a kind of vegetable tempura, using vegetables in season, or salad. We only and always have salad with meat or fish, and never before a meal.


As you can see, below, I cooked some pasta al dente, of course, and served it with some sauce and a sprinkling of ricotta romana (or ricotta dura, a kind of Italian Feta cheese, but nicer!)


This dish reminds me of home and, to me, it's the most Italian of dishes, as it unites the Nation from  the Alps all the way down to Sicily!
BUONA DOMENICA!

Friday, 23 March 2012

Ciambella alla Ricotta e Arancia ( Ricotta and Orange Ciambella-Italian Ring Cake! VERY GOOD!)


Ciambella


She knew it must be Sunday, as she woke up to the aroma of  coffee and "Good things to eat!" Mamma had been busy making a ciambella... the scent of orange and vanilla waltzed through the air, all the way to her room... Sunday was such a special day!

She picked up her new pair of black patent shoes and let her little feet slide into each one : she always loved getting new shoes!

Following the aroma, she would make her way to the kitchen. Mamma would be standing by the table, a cup of espresso in her hand, proudly looking at the cake she had just taken out of the oven.

Rosa wasn't a cake maker, but occasionally she would try. No cake ever tasted better and sweeter than her ciambella, though, or the Pizza di Ricotta, she made for the family at Easter.

"Ne voglio una fetta!" ("Can I have a piece?") she would ask her mum "No, aspetta che si raffreddi!" ( "You need to wait till it cools down!") Could she really wait that long? How could her mother be that cruel? Ringo, the canary, flew off the curtain pelmet, and landed on nonna's lap... I think he could smell the happiness, too...

Ciambella has to be the cake which is made in every household, in Italy. It's more popular than tiramisu`, cannoli, or any other sweet. My recipe is a bit special, as it has ricotta as one of the ingredients. It's so easy to make, and really delicious!


Here is my mum's recipe:

Ciambella all'Arancia e Ricotta
Ingredients:

250 g (9 oz) plain, all purpose flour
80 g ( 3 oz) cornflour
100g ( 3 1/2 oz) ricotta cheese
4 eggs, beaten
1 orange
150 mls ( just over 5 fl oz)  oil (I used sunflower oil)
1 heaped teaspoon baking powder
butter for the cake tin
confectioner's (icing) sugar

For the filling:

200g ( 7 oz) ricotta
some lemon rind
some orange rind
(1 tsp of each)
2 tbsp confectioner's (icing) sugar

Before you start, zest your orange and squeeze, to extract  all the juice out of it. Next, place your 100g ( 3 1/2 oz) of ricotta in a  bowl and gradually incorporate 100g ( 3 1/2 oz) of sugar.

Gently fold in the eggs, a small amount at a time, the oil (very gradually) and the juice of your orange (I added just half, as I didn't want it to be too liquid!) Mix these ingredients.


Sift together flour, cornflour and baking powder (Paneangeli, if you are in Italy) and add to the mixture. If you like vanilla, you can add a few drops of vanilla essence, as it goes well with the taste of orange. By the way, at this stage you can add the orange zest, but remember to keep a small amount to be used in your ricotta filling!


I buttered and floured a ring cake tin (ciambella tin) then poured my delicious cake mixture into it, let it settle, then baked in a  hot oven (180 C,  350 F, Gas 4) for 30-35 minutes.
While my cake was cooking, I could smell those aromas so familiar to me and found myself dreaming... but not for too long, as my ciambella was ready in no time.


I'm not a cake maker, but I must admit that my ciambella looked really good! I decided to add an extra dimension to it, by making a filling. I used: 200g of ricotta, some lemon zest (about 1 heaped teaspoon,) icing sugar and just a teaspoon of orange zest. Having mixed these delicious ingredients together, I cut my (cold) ciambella across its width, spread my sweet ricotta all over the ring, dredeged in lovely icing sugar and garnished with grapes and mint. It looked like a "natura morta!"


I couldn't help thinking how special it would have been, if I had filled the "hole" with whipped cream and fruit, instead! But not too healthy, I guess... but so nice!


Sunday, 11 March 2012

Pizzoccheri Vivaldi (Fresh Wholewheat Pasta With Spring Vegetables and Sausage)


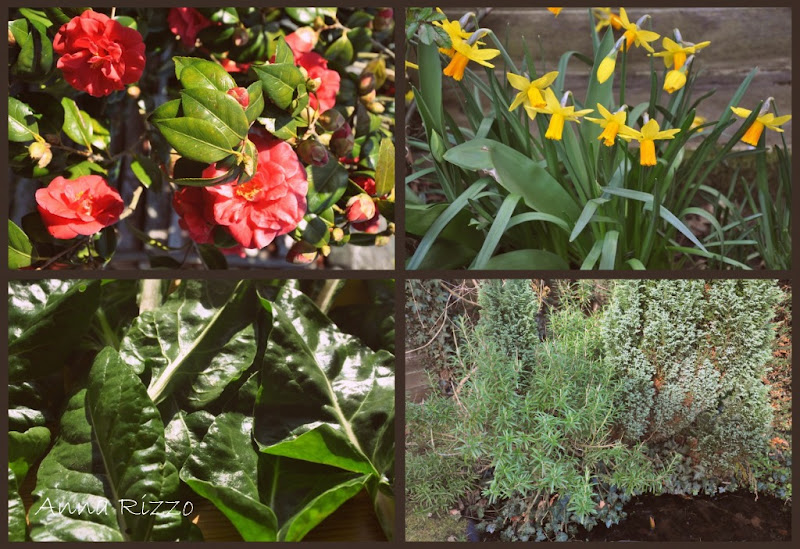
A sunny day! I had been so busy working away and writing, hour after hour, for two days, I felt the need to go outside. The birds were singing, the sky was blue, the daffodils fully out, in all their custard coloured glory, my beautiful gigantic camellia in full bloom, big and majestic, like a soprano... it all felt pretty good! 

In my little vegetable patch, my bietole (Swiss Chard) was beginning to show off its shiny green splendour: little green leaves lifting their "arms" towards the sun... and there I was, looking at all of this and trying to find the first few buds on my newly acquired red currant bushes, when I got the urge to "make" something good and beautiful, using some of the ingredients in front of my eyes.

I picked a couple of handfuls of shiny leaves, a lovely sprig of fresh rosemary, a bunchlet of Italian parsley and in I went!


I had seen this recipe in one of my Vero Cucina magazines which I have A LOT OF here and at our house in Italy, a recipe for Fresh homemade wholewheat pizzoccheri (pasta rectangles) with Swiss chard, sausage and fontina cheese.
Having got hold of all the ingredients, I decided to make it. I would also make my own pizzoccheri with wholewheat flour (a first for me!)

I think I definately re wrote Vivaldi's Primavera (Spring) with this one!

Pizzoccheri Vivaldi
(Fresh wholwheat pasta
with Spring
vegetables and sausage
For the sauce
(Serves 4)
4 tbsp olive oil
1 clove garlic
4 sausages
a sprig of fresh rosemary
a small bunch of fresh parsley
a glass of red or white wine
Parmesan cheese
Salt
black Pepper
200g ( 7 oz) Swiss chard
1 little gem lettuce
120 g Fontina cheese

Home made Pizzoccheri
(serves 4)
400g (14 oz) wholewheat flour
warm water
salt

I made my sauce first. Before I started, I took the skin off my sausages, so I would only have the meat, then chopped it finely.


Next, I chopped my garlic clove, my parsley  and rosemary (this needed to be chopped extremely finely, as rosemary can be a bit tough and woody.)
In a large frying pan, I heated the olive oil and, when piping hot I added the garlic, cooked until golden, then I put in my meat and fresh herbs. I stirred until the meat became brown, but not burnt.

At this point I added a glass of wine, turned the heat up and let all the alcohol evaporate ( the recipe calls for red wine, but I actually find that red wine is intrusive and turns meat a funny colour I dislike! )


My sauce was  made! At this point I added a lot of grated Parmesan to my sauce, I grated mixed peppercorns all over it and tasted for salt. Quite, quite delicious...
Having washed my chard and my little gem lettuce, I decided to chop the lettuce, but leave my baby chard leaves whole, as they were so pretty, delicate and tender!

At this point, with the sauce off the heat, I put some cold water in a largish pan, to heat. Whilst I was waiting for it to come to the boil, I made my pasta, using flour and enough warm water  to make a firm, but soft dough. It took five minutes. I left my dough to rest for about 15 minutes, then I rolled it out and, using a large knife, I cut out my pizzoccheri. It was so easy!


By now my water was boiling, so I added all my vegeatbles with some salt, cooked for about 6 or seven minutes, then added my pizzoccheri pasta, making sure to stir.
Within six or so minutes, my pasta was ready to be drained, together with all those green beauties.


When I added  pasta and vegetables  to the sauce, and most f my fontina cheese, I began to smell a truly delicious aroma: fresh vegetables, wholewheat flour, fresh herbs, cheese, some meat: music on a plate!


I mixed everything together in the pan, added more cheese and pepper and garnished with more fresh parsley and a few diced pieces of fontina!


Don't be put off by the number of words I have used to describe this dish, as it truly is very, very easy and quick, and, of course, you don't have to make fresh pasta, if you don't want to (I normally wouldn't!)
BUONA PRIMAVERA!

Sunday, 4 March 2012

"Panini di Funghi al Pesto e Mozzarella" (Mushroom "Panini" With a Fantastic Mozzarella and Pesto Filling )


I  so WANT Spring to be here! I need the warmth, the comfort, the colours and scent of renewal. I want to shake the weight of a long, dark Winter off my mind and my body... I look for "signs" everywhere around me.
This time last year, we were in Italy. I had almost forgotten about the scent of the freesias and the cherry and almond blossom and the sense of happy, new beginnings, under a blue sky. But it suddenly all came back to me...
I felt a bit homesick, today... it was raining over my daffodils and my first camellia flowers were already being bruised by the rain. I felt sad and needed to "create" something really, really fragrant, full of flavour and colour... something beautiful and NEW which would remind me of HOME!
So... I created a delicious new dish you won't find anywhere else, because it's all mine!
Here it is:


"Panini" di Funghi al Pesto e Mozzarella
Mushroom "Panini" With a Mozzarella and Pesto Filling

Ingredients:
(makes 2)
4 large Portobello mushrooms
2 eggs
4 tbsp breadcrumbs
1 tbsp grated Parmesan
Salt
Black pepper
2 leaves fresh basil
some flour and extra bredacrumbs for coating
some olive oil
(for the baking tin)
For the green pesto:
A handful fresh basil
or a mixture of basil and rucola (rocket)
1 small clove garlic
1 slice fresh red chilli pepper
(optional)
2 tbsp pine kernels
or any other nut
(I used mixed nuts)
2 tbsp Parmesan cheese
2-3 tbsp olive oil
Before I started, I made my pesto, by simply placing all the ingredients in a small food mixer and blitzing it all together. I also made red pesto, to be used as garnish (see below.)


I then removed the stalks out of the mushroom, which I chopped and placed in small dish, with 1 small egg ( I only used half of the egg white, in case my stuffing was too runny!) 4 tbsp breadcrumbs, a couple of torn basil leaves, some salt and black pepper. I mixed these ingredients to make a lovely stuffing, which I then divided into two equal portions and placed in the middle of two of my four mushrooms.


Next, I placed a small portion of my green pesto, some rucola (rocket) leaves and a slice of mozzarella into the other two mushrooms. Now, I was ready to sandwich the four halves together, to make two "panini!"


My "panini" looked so gorgeous, big, fat, filled with the scent of spring and full of promise! The next thing I did, was to carefully coat my "panini" with flour, then "dipped" in whisked egg (I used egg #2, for this) and finally, coated in a generous dusting of lovely breadcrumbs.
Though I had previously intended to fry my mushroom, I then decided that there was no need for the extra unhealthy calories, so, I judst poured a tiny bit of olive oil on the base of a baking dish and cooked my "panini" in a hot oven (190 C, 375F, Gas 5)


As my mushrooms cooked, I could smell the aroma of my lovely homemade pesto (you can use the bought kind, if you want to simplify the recipe!) and the rucola, the basil, and I could feel the heat coming from the oven!
Twenty minutes later.... my "panini" were ready! The cheese and the pesto had combined their flavour... melted mozzarella was oozing out of the mushrooms... the breadcrumbs had turned a wonderful golden colour and I couldn't help but have a taste of the savoury delight I had created. It tasted so good, a word is yet to be invented to describe my new dish.


PS: I also made red pesto, as I wanted to use it as garnish, using four sun dried tomatoes and a small handful of rucola (rocket leaves) instead of the mixture of basil and rucola I used to make my green pesto. I used a tiny amount of red pesto as garnish for my "panini" and the rest I had with fresh homemade cavatelli (yes, I made them!)


I will not be modest: the result was delicious!


Tuesday, 21 February 2012

Variazione Sul Tema (Linguine Nests with Fish Fillet- Nidi di Linguine al Pesce)


There is no sea like the Adriatic. Its waves gently "caress" the coast of Bari, the place where I was born. The sound of those waves gently crashing against the rocks, the smell of the seaweed, the song of the seagulls and the taste of salt on your arms, on Summer's day, are always there, hiding, deep inside me, a constant reminder  of who I am and where I came from. I love the sea!


Today, I made this dish which reminds of the colours, tastes and aromas of my land and of "my" sea. Maybe not one my mother would have made (she was a classic cook) but... I remember her making frittata using eggs, cheese and spaghetti! So, maybe the dish I am about to show you is a variation on a traditional theme and one of the main ingredients is fish!


Food, just the same as language changes, evolves, expresses itself in new and different ways. Today I made some Nidi di Pasta al Pesce "Pasta nests with fish." Would I call this an innovation, a modern recipe? Maybe! The ingredients are traditional, but the end product, I think, is quite innovative.


This dish could be served as a starter to a meal, served in small portions, like I did, or as a main course. Believe me, when I say it's truly delicious. On this occasion, I enjoyed marrying up some of  my favourite flavours! 


Here it is:

Nidi di Linguine al Pesce
Linguine Nests With Fish
Serves 4

For the "nests":
4X100g fish fillets
(about 1lb altogether-
(could use sea bass or cod)
a few tbsp olive oil
1 garlic clove
salt, black pepper
200g ( 7 oz) linguine pasta

For the sauce:

3 tbsp olive oil
1 garlic clove
1 tbsp capers in vinegar
handful black olives (pitted)
8 sundried tomatoes
handufl fresh parsley
some basil
1 tbsp passata or
pureed tomato
few slices chilli pepper (optional, but not for me! I love it!)

Before you start, bring some water to the boil, in a saucepan. When really boiling, add your linguine with some salt. Cook until "al dente", rinse in cold water, drain and reserve.


Prepare all your other ingredients. This dish is very quick to prepare.

Next, take a piece of fish and wrap it in a quarter of your linguine, to make a nest shape, with the fish in the middle of it. The linguine will be very slippery, but don't worry, as, during the next stage you will be able to bring it all together. Make and keep your nests, one at a time, on a flat plate.


Take a non stick frying pan, put a few of tablespoons of olive oil in it, and, when hot, slowly and carefully slide your first nest into it. Try to turn the nest over a few times, until your linguine turns a lovely golden colour. Don't worry if the "nest" looks messy. I used a fish slice, to turn the mine over. Add a clove of garlic, finely chopped, salt and pepper.
Remove your nests from the pan when nice and golden and keep in a warm place (warm oven?) as you are now ready to finish the dish.

Using the same frying pan, make the sauce. Add the rest of the oil, heat up, then add a clove of garlic, chopped (cook until golden) followed by: capers, sundried tomatoes (chopped really small) parsley, basil and chilli pepper, if you are using it. I then added a tiny amount of passata (less than a tbsp!) to make a sauce which wasn't too dry. I also added a couple of tbsp of the water I drained off my linguine. 


Let the sauce reduce slightly, cook for about five minutes, then divide amongst the four portions. This should be a kind of dry sauce, but, if you find it too dry, you can, like I did, add a few tablespoons of the water in which your pasta was cooked.


When you taste the fish in the middle of the nest you will be surprised: it cooks, but keeps all its moisture and flavour. I combined some of my favourite "things," but had to chop the sundried tomatoes very finely, as I don't like the texture of tomato skin.
The dish is very Mediterranean, indeed. The flavours robust and very familiar to me... it's a good dish, easy to make and well worth trying!


                                                            DE-LI-ZIO-SO!